Step-by-Step Process
Step 1: Open the candidate’s Workflow Progress
- Open the candidate and go to the Workflow Progress timeline.
Step 2: Review the “Added” event
- The first entry shows how the candidate was added — for example, “Added via Queue by Deepa Agarwal” — along with the date and candidate owner.
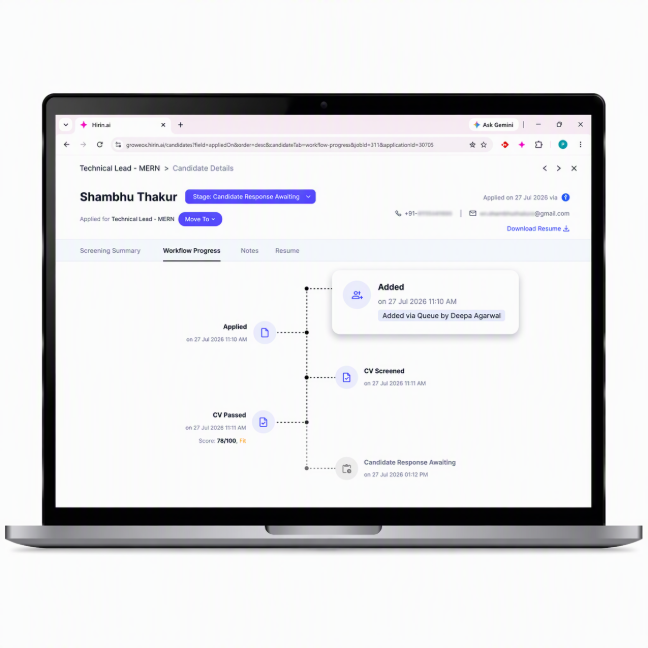
Figure 1: The “Added” event at the start of the Workflow Progress timeline.
Action Ownership in the Workflow Progress Timeline
Every action in the Workflow Progress timeline now shows who performed it. Each event carries the name of the user who acted and their role, so you can see at a glance who moved a candidate forward and when.
Key Highlights
- Stage movements display the destination stage and the user who made the move — for example, “Moved to HM Round 2, by Dhaval Vora”.
- Review events display a Performed by label naming the user who submitted the decision — for example, “Performed by: Anuj Bhatt”.
- The user’s role (Recruiter or Hiring Manager) is recorded with the action, so recruiter actions and Hiring Manager actions are easy to tell apart.
- Attribution appears on stage movements and review events throughout the timeline, including the HM Round and HM Round 2 stages.
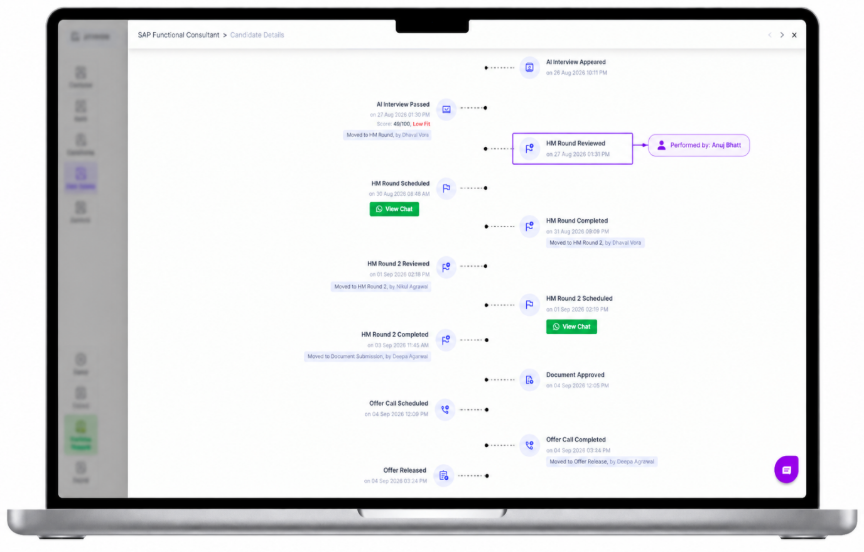
Figure 2: Workflow Progress timeline showing who performed each action
Good to Know
- Events that are not driven by a user — for example an AI Interview being completed or a document being approved automatically — appear without a user name.
Things to Remember
- The “Added” event gives you a complete candidate journey, starting from the candidate’s first entry into the pipeline.
- Action ownership makes it clear who moved a candidate at each step, which helps when several recruiters and Hiring Managers work on the same job.
Was this article helpful?
That’s Great!
Thank you for your feedback
Sorry! We couldn't be helpful
Thank you for your feedback
Feedback sent
We appreciate your effort and will try to fix the article